Showing posts with label diy. Show all posts
0 com

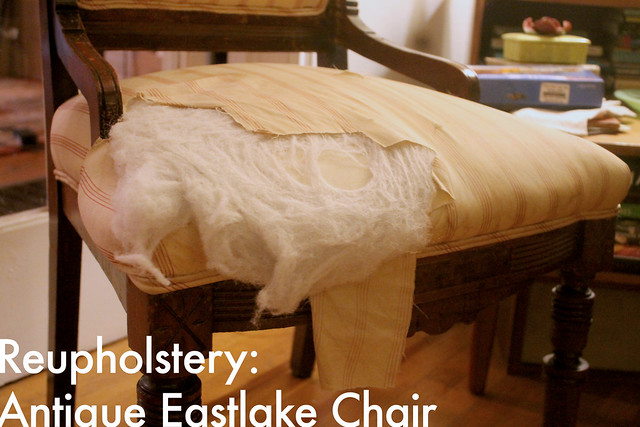
Life: Deciding to revamp this here blog... maybe


Salut! C'est moi Lauren! Haven't seen me in a awhile! Well here's my face again.

One thing I've missed over the past few years was this little blog. I had been a way to keep track of my life and something I still look back on frequently to remember outings, outfits, and where I was at in my life. So why not try again! I've come back to this post often, trying to re-write it.

Since last I wrote lot's have changed, but I can feel that I'm headed down the path to become my true self more and more.

1. The biggest visual change is I've adorned my body with some amazing tattoos. I'm at 12 right now, which isn't a huge number, but they are large and I have traveled for them. Since last blogging I've gotten a Magnolia on my back from a traveling artist named Ellen, I chose a magnolia because I have a beautiful tree outside my house in Oakland, I also got it when I became a manager of the design team at WU. After I got an amazing blackwork piece of acorns and oak leaves on my arm by the amazing Lawrence Edwards. Next I got a large thigh piece of my dog Tripp, while traveling with him on a road trip through the Pacific Northwest. It was a literal road trip I planned to get a trip tattoo of Tripp... say that three times fast. It was done by the ever so talented Shawn Hebrank, whom I can't wait to get more from. I went with my best friend Marlee before she moved to the UK to get tattoos from Regina in Oakland and I got a silver millennium crystal and time key on my sternum. Then I made my way to Europe for the first time alone and was able to snag a spot with the goddess of ink Kate Mackay-Gill and got a whimsical white squirrel circling my knee and interacting with my Tripp tattoo. I have a shoulder piece by Jessica Zed of a bouquet of flowers representing some women in my life, peonies for my mom, roses for my grandma, forget-me-nots for my alaskan family, and fireweed for in general the women who were there for me during my summer in Alaska years ago. I received a beautiful rib tattoo of blueberries and moth by the incredible Ella Coose, who is amazing and so young, she will become a major famous artist I can feel it. I got an amazing Pacific Dogwood and Coastal Redwood tattoo on my forearm by Annelise before she moved to Portland, OR. And started a huge floral back piece with Cecelia! Soon I will be covered in beautiful flowers and animals. Oh also I fulfilled a desire I've had since jr. high and got my septum pierced, and have icy purple hair.


2. Travel, I've done tons of travel and mostly alone. I never thought I'd like the solo travel aspect but I love it especially for road trips. You can stop anywhere, listen to anything, have your own schedule... I love it. I did two long roadtrips alone (well with Tripp dog of course) and stayed in so many places, met up with old friends and met some interesting people along the way. Last year I finally went to Europe, I spent a week in Scotland with my friend Marlee traipsing about the Orkney Islands and Edinburgh, then hopped over to Paris where I spent 5 days alone in a country where I didn't speak the language... It was fine! haha! I stayed in a hip hostel and made friends immediately. I can't wait to do more foreign travel! I also went on a girls trip to New Orleans!! I definitely want to go back there too.

My most recent solo trip was to India to see my dear friend Sonali get married! It was an overwhelming once in a lifetime trip and I saw so many amazing sites, and it was really really hot... Then went over to Amsterdam to see an old highschool friend from Brasil!


Pictures from India and Amsterdam. 

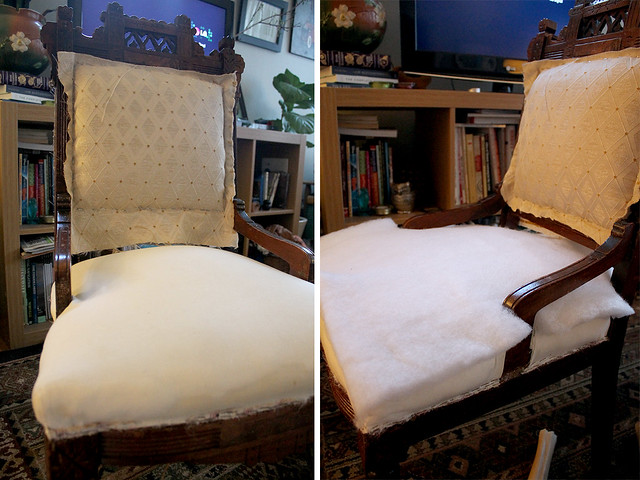
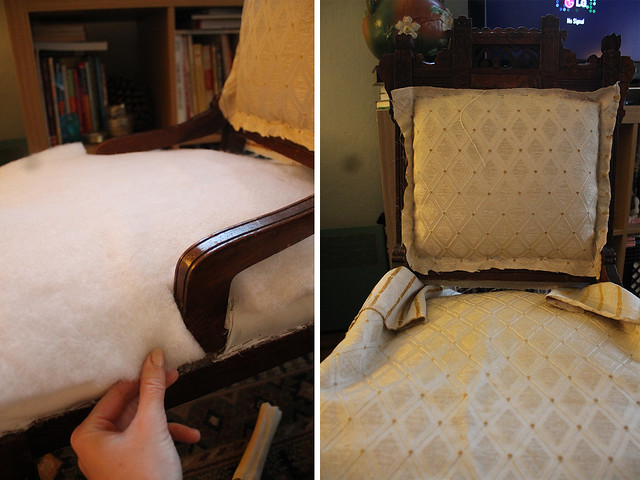
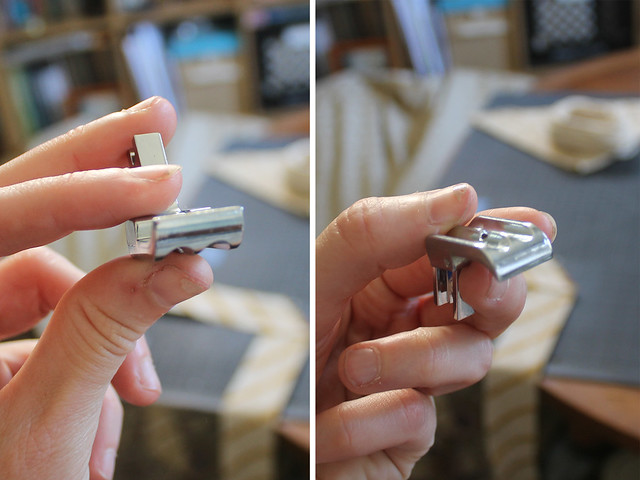
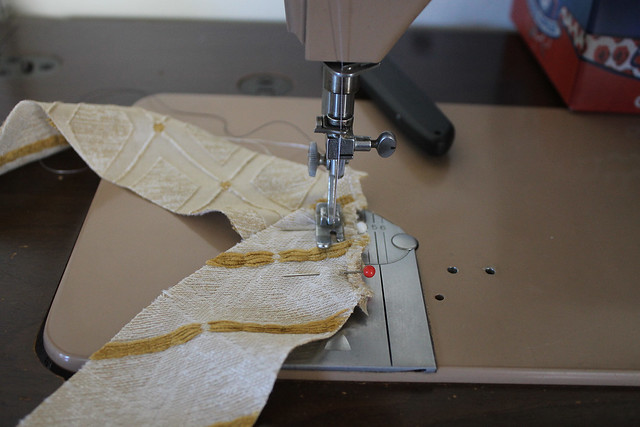
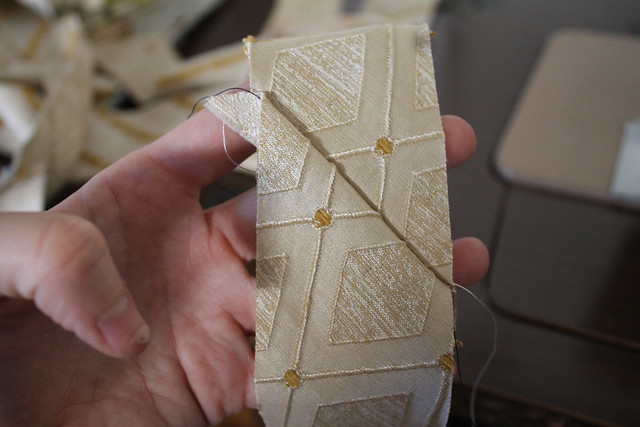
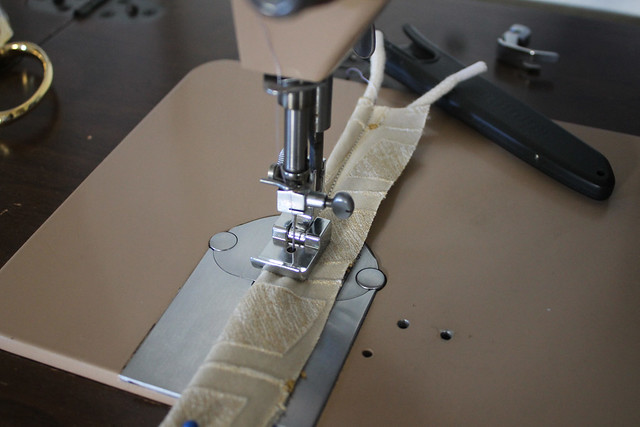
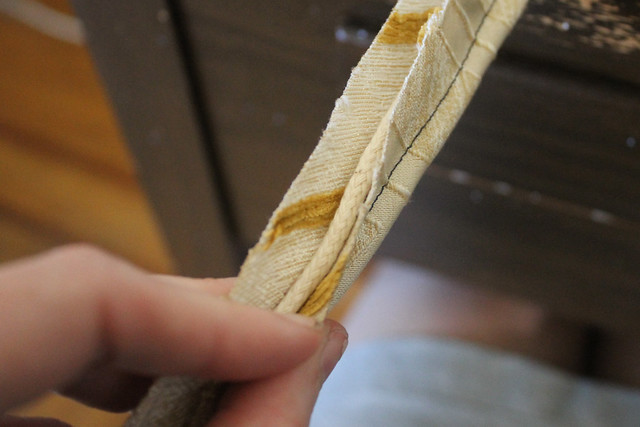
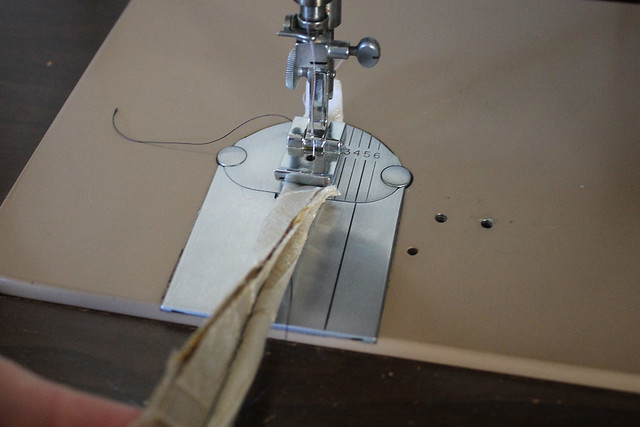
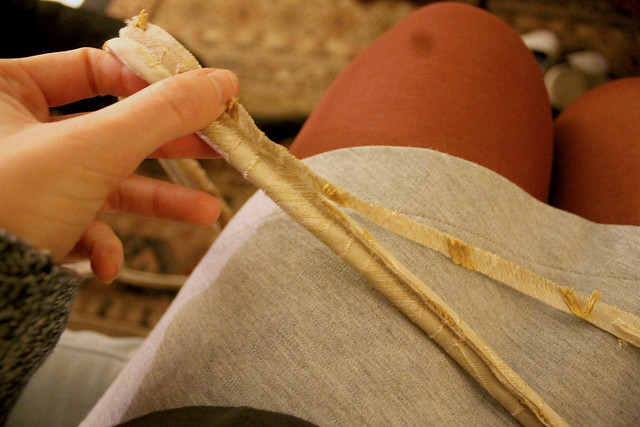
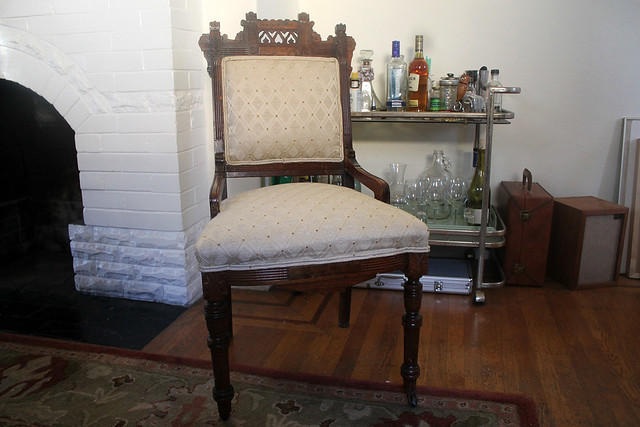
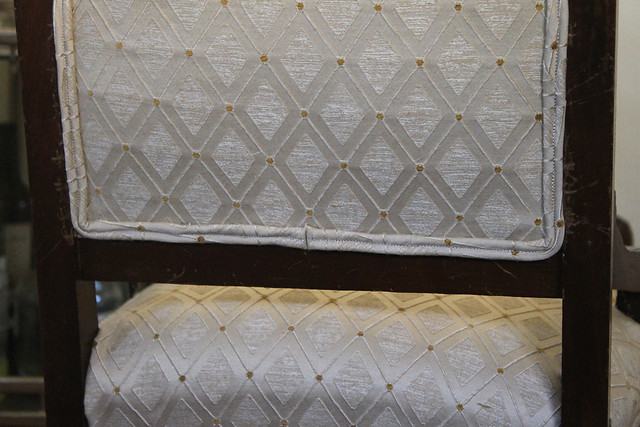
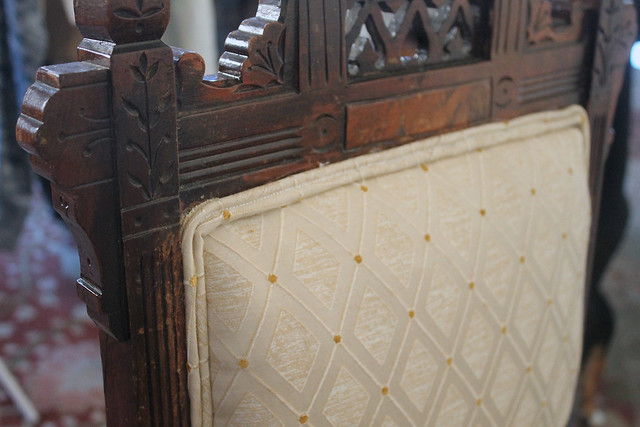
3. The most important thing... I've become an avid costumer and vintage/antique clothing collector. As anyone knows who knows me, I LOVE dressing up. I always have. I love vintage clothing. I love history. I was obsessed with American Girl dolls as a child, I loved history and dress. I remember telling my mom I wish Colonial Williamsburg forced the tourists to wear costumes because people in shorts and fanny packs among the history made me angry. I have made myself many costumes, and my mom taught me how to sew and care about authenticity when she went thru pains to make the American Doll clothes she made and sold accurate looking. Slowly and surely through art friends here I was exposed more an more to the costume community here. And that has lead me to now being on the board of the Greater Bay Area Costumers Guild, attending and attend Costume College, a costuming convention in LA, yearly. But most importantly I have made friends so deeply that I didn't know I'd have those type of friends after college. Everyone is so wonderful, helpful and supportive. What this has also taught me is how to mend clothes better and make clothes with less waste. Old techniques of creating clothes is fabulous to use in modern sewing and mending.


Here's some quick pics of the past 6 months of costume. 

4.  The biggest challenge in my life is I've started again to really concentrate on creating a lifestyle that I consume less and create more. Currently where I focus on for this challenge is my backyard garden, my food cycle, and also through my style. 80% of my closet is USA made, me-made or vintage/used. I've started preserving food again and only growing or buying from the farmers markets. My partner and I have built an amazing garden in the backyard and discuss when we will have a small homestead and live more off the land. I've started making another effort to cut plastic out of my life and reuse as much as I can. We also have two forms of composting, worms and a tumbler. My goals is practicing more different food creation and how to process it. François works at an urban farm in San Francisco so we get lot's of food to experiment with preserving and processing, currently as I type he's figuring out how to best hull his millet harvest. I'm really excited to learn more and more how to be self sustainable and also appreciate what I do consume and buy that I don't make.

 Flowers from my garden. Bells of Ireland, Yarrow, and Snapdragons.

What I've now found, I'm living what I loved as a child. Tattoos, dressing up like a real life American Girl doll, gardening, doing handicrafts, just making and solving the question, how was that dress made? And learning how to live fully on my own and grow and make everything.

0 com

DIY: Eastlake Chair Reupholstery

Eastlake Chair Reupholstery

A couple years ago I bought this nice little carved wood chair with ripped upholstery for a steal at the White Elephant Sale that happens in Oakland every year. I also got a bunch of upholstery fabric there too that looked good with the chair. After doing a little research I found out that this was an Eastlake Chair from the Eastlake Movement which was a design reform started by Charles Eastlake, the pieces all feature carved wood. After doing research to my surprise and delight it seemed the fabric went with the period of the chair.

Eastlake Chair Reupholstery

Fast forward a couple years the stained re-upholstery job in a thin cotton fabric that was on the chair when I got it ripped more and more. So I finally took the time to reupholster it with the nice new thick fabric. First I pulled off all the old gross double welt (double welt is the detailing bordering the upholstery and covering the staples, you can also use gimp instead, but welt looks more professional). Then I slowly removed the fabric so then I can use the pieces as a pattern.

Eastlake Chair Reupholstery

I started with the back of the chair since it was flat. I stapled the fabric on like stretching a canvas, after lining up the fabric I started in the middles of each side then stapled out to the corners. Then I did the front of the chair in the same fashion. For the bottom cushion it was a bit more complicated. I took the matted batting off the bottom cushion and the muslin and springs were in a good condition so I didn't have to replace them. I cut out new batting and just placed it over the cushion, didn't staple it or spray glue it in place. Then I took my bottom piece which I kinda had a rough pattern for. I draped the fabric piece, lining the pattern up to the back pattern and then cut it to make a perfect fit, turning under the edges that go around the wood back and side rails so that there were no raw edges. I first stapled the back then pulled it to the front and then the sides, then filled in the staples to the corners. This took a lot of trial and error. I pulled a lot of staples out and redid them many times. Just have patience! Then trim all the excess.

Eastlake Chair Reupholstery

The next step is to make all the double welt for the edging. Measure around all the edges and then double that to get the amount of cord you need. I got a 1/4"-3/16" cotton cord for mine because the fabric was so thick. After getting the cord you need a double welt foot for your sewing machine. I know for single welt cord you can use a zipper foot, but the easiest way to make double welt I could find is to get a special foot. It cost me around $12 and I ordered it from the local sewing shop, but seems definitely worth it. If you don't have a sewing machine you can contact a local upholsterer and see if they will make it. Next step is to cut biased strips for the cording. Cutting on the bias means to cut at a diagonal so that the fabric bends around the edges smoothly and it has a bit of stretch to it. I first started with a square then used a rotary cutter and ruler to cut 2"-ish strips, I found out later that that was a little too small, I should've cut more like 4" strips.

Eastlake Chair Reupholstery

Then I sewed the strips together, place the strips face to face perpendicular to each other on the edges. After ironing the strips I was ready to welt! I'll write how I did it, but this site has a way better explanation, (http://www.prettyprudent.com/2010/09/prudent-home/how-to-make-double-welt-cord-2/).


Eastlake Chair Reupholstery

I first laid both cords in the fabric like they were hotdogs in a bun and had a bit more overlap of fabric on the top than bottom. I lined everything up with my double welt foot with the open fabric to the right of the foot, and started stitching a straight line. That first stitch sews in the the left cord. As I sewed I made sure everything was tight. When I took the open side of the fabric and wrapped the open edges from the right to the left and then sewed a straight line down the center again with my trusty welt foot. This than sewed in the right cord into the bundle. When I was done I trimmed the back and got it ready to hot glue!

Eastlake Chair Reupholstery

First to get the ends of the double cord ready, pull the cord out of the fabric a bit and trim it, then pull the fabric back over the cords and fold it over, that'll make a nice edge for you to start putting the welt on. With you trusty hot glue gun start in the bottom middle of the front or back of the chair. You want your cording seams to be on the bottom in the middle. When you come to the end, do the same trick where you cut the piece a bit longer than you need, then pull the cord out a bit and trim it to fit, then fold the fabric under and you have a nice clean edge. The front of the the chair bottom was a bit more difficult, and again take you time and go slowly!

Eastlake Chair Reupholstery

And then TA-DA! Finished chair! Well a little more than that, but look it's finally finished! I learned so much and can't wait for my next upholstery project! I have the mid century bucket chair but Mike just found me another easier upholstery project on the curb! So I'll do that before I get into the hard bucket chair reupholstery. I'm so excited!

0 com

Making: Prickle Pear Cactus Jam


I guest blogged over at the Libby's Urban Homestead about making jam out of the prickle pear cactus fruit. These grow all over California and the Southwest, are easy to harvest, and make an amazing tasting jam!

Head over to check it out!

0 com

Housing DIY: Regrouting tiled kitchen counter

When I first saw my kitchen I thought about how adorable the light yellow and black tile was with the vintage shallow sink. Once moving in I saw that the tile work was in desperate need for a face lift. One side of the counter the tile is in wonderful condition, the other is pretty pitiful, it looks as though people throughout the 100 year history have put many a hot pot on the tile, resulting in pitting on the tile. And don't even mention the grout... oh the grout... it could probably tell a decades of cooking stories and those were stories  that I really didn't want to know. So I decided to take it upon myself to re-grout! I know I know, it's a rental, but things like this is such a cheap fix that you can do it in one evening. (I also always buy a new toilet seat at rentals... it's the best $15 you can spend).

So first I read as many how to's and watched many youtube videos! Here's the one that was the most helpful.


tile-1

First I went to the hardware store, got non-sanded grout (sanded if the space between the tiles is more than a 1/4"), a screwdriver, a grout float, a big sponge, cheesecloth, and tile chaulk for around the sink (not included in this tutorial)

Anyway so my tiles started out with this.... dark grout hiding the loveliness of the yellow tilework.

tile-3

I used an old flat head screwdriver and a leather punch to scrap all the grout out, I'm not going to lie, it was pretty gross.

til-2

Then I vacuumed all the gunk away, brushed the counter top off real well and wiped it down with a towel. I waited till the next day to start the grout to make sure the tile was dry.

tile-4

Follow the instructions on your grout and mix it together, scoop the grout on the counter and spread over it the tile with the float at an angle pushing the grout into the tile. Go over many times making sure that there is grout between all the tiles and putting more grout when needed. Do not push too hard where you are pulling grout out from inbetween the tiles, try to spread the grout at an angle to the tile.

Let the grout dry for what the instructions say, about 20 minutes for mine. It'll start to set and after the alloted time wipe the counter down with the clean, wet sponge. Again don't press too hard, and don't have a wet sponge just damp you don't want to be dripping water. After this let the grout set even more my instructions were for 2hrs.

tile-5

tile-7

After those hours your tiles will appear cloudy, use your cheese cloth to buff the haze off. And voila! Wait a full 24hrs before putting things on the counter or you seal the grout to prevent staining. Overall I'm so happy I did this, it really just makes everything looks so fresh and so clean clean.

tile-6

tile-8


PS: Sorry for the poor quality pictures, my nice camera was out of commission. :)
0 com

Lonely Crafts: Vase Succulant Garden!


Don't let the title make you feel sorry for me. I think lonely crafts can be the best, cause it's better than sitting on your ass watching three hours of reality tv... Adding a craft to the viewing of that reality show make it's alright!

Last year when I was visiting good ole Ohio, my mom and I went on a mandatory flea/vintage/antique shopping spree! Cause you see, vintage on the west coast is maybe from the 70's and costs an arm and a leg. Ohio however, oh Ohio, your cheap prices and thrifting galore. Anywho, we went to the antique barn and I found this four piece set of white Roseville pottery. If you didn't know, which I'm sure you don't unless you're from Dayton, Roseville Pottery was a company started in Ohio in the late 19th cen, but is most famous for their art deco/art nouveau pottery and were part of the early 20th cen arts and crafts movement. I got four matching pieces from the magnolia collection in white... Which I've never seen! My mom and grandma both have Roseville and even my elementary school and highschool had Roseville drinking fountains and tile work.


So I got two small upright vases and a bowl vase with a flower frog. I've found uses for the two small urn like vases, but the bowl was a hard one. I did put fresh flowers in it a few times, but I could never get it to look good, floral arrangements are not my forte. So when one of my coworker's gave me a bag of succulent cuttings I was like "idea!" and decided to do a little succulent garden in the bowl. Using also some of my garden's succulent cuttings I made this nice little garden.

So here's what I did. First put tons of pebbles and rocks on the bottom evenly to help with drainage. Then I used Miracle grow cactus soil, you can also put some carbon between the two layers but I didn't have any sooo... that didn't happen. Then I packed soil into the flower frog which will be in the center of the garden. Then carefully I took clippings, some with roots and some non rooted and put them all over. I also saved a couple plants from dying pots like my cactus. I didn't fill everything in cause hopefully the ground covering succulents will fill it in. And I used a couple plants that needed some love, so it isn't totally gorgeous looking now but hopefully won't die and become more beautiful!


I'm so happy that this bowl vase now is more attention seeking. And doesn't is look great on my Andre Bus Acclaim end table?! I just recently got that table to go with two other Acclaim pieces I own. I definitely need to fill you guys in on my decorating of our apartment!! It's coming together so well, the music/dining room is almost done, and the living room is pretty much done with lot's of plants that I've kept alive now for 7 months! Yay! I just really want to turn into a crazy plant lady! We've also planted a veggie garden in the back, and have a whole entertainment and eating area in the backyard.

Anyhoodles let's see if I can keep up with blogging!
-Lauren
1 com

DIY: Nautical I Love You!


Yay! I'm so happy you guys liked my sailor top I made. So to continue on with the trend here's a fun nautical inspired DIY Project! Creating hidden messages with the international maritime flags! Here's a print out you can cut out at home and hang up this for the one you love like a sailor loves the sea! C'mon everyone loves this whole nautical look!


Start out fist downloading this pdf https://docs.google.com/file/d/0B4oTVeyiNDfudUx1c20wSVlpREk/edit?usp=sharing. Cut between the g=flag shapes where the arrows tell you to cut. For best results use a ruler and xacto blade. Fold the 8 rectangles in half to make little squares. Then get a cute piece of ribbon, twine, or string around two feet in length and take the folded flags and put the string in the fold, like a hot dog into a bun! Try to space them evenly or into words like I did. Then take a glue stick and swipe some glue into the fold and shut the fold over the string. Let the glue dry then take the ends of the string and hang up your nautical flag pennant flag!!


I love my little flags hanging over my bed with my awesome California hanging to remind me of the adventures I've had out here and all the fun things I've done these past two years by the sea, on the sea and sailing. look up online for the whole International Maritime Flag alphabet, and make your own phrases! Here's the wikipedia article about these awesome flags (http://en.wikipedia.org/wiki/International_maritime_signal_flags)


Have fun making your sea loving message, and let me know how you like them!

Huggles,
Lauren